Saturday, November 28, 2015

Diamonds are a Girl's Best Friend

Ms. Marilyn was correct- diamonds are a girl's best friend.  Whether it be in a ring, a necklace, or on a wall.  Diamonds can do no wrong.

When I first moved in, I loved my bedroom.  Coming from a home where my master was about 11' x 11', it was sooo much space.  I was able to fit furniture from two of my old rooms in this room, and still have plenty of space to spare.  The angled ceiling was a really neat feature, and made it feel even bigger.  Part of me loved the two levels in the bedroom because it kind of created a built in sitting and sleeping area, and part of me was terrified of it- still waiting to wake up in the middle of the night and fall on my face trying to get to the bathroom.


Though it was a neutral color, it was missing something.  The more and more time I spent in the room, the more and more that "neutral" color started looking more and more yellow.  Especially with the brown carpet.  I decided that I wanted to paint it with some gray.  So I went to Home Depot (with my curtains- yes, I'm that girl at the paint samples holding up curtains) and found three color samples that I liked.  I knew that I needed two different colors because I was going to do the one wall in a darker accent color, and the three other walls in a lighter shade.  I got these cool sample sheets that I'd never seen before- they let me test the colors without ruining the wall- it's always such a pain to cover up your testing area!  So I put the three in a corner... I learned in my old house that there has to be a good amount of contrast in the two colors or it would be almost unnoticeable.


After staring at it for a while, and taking a few votes, we decided on the dark gray (Anonymous by Behr- which according to the paint guy, is one of the hottest colors this year) and the bottom shade (Silver Bullet by Behr).  I got both colors in a flat/matte finish.

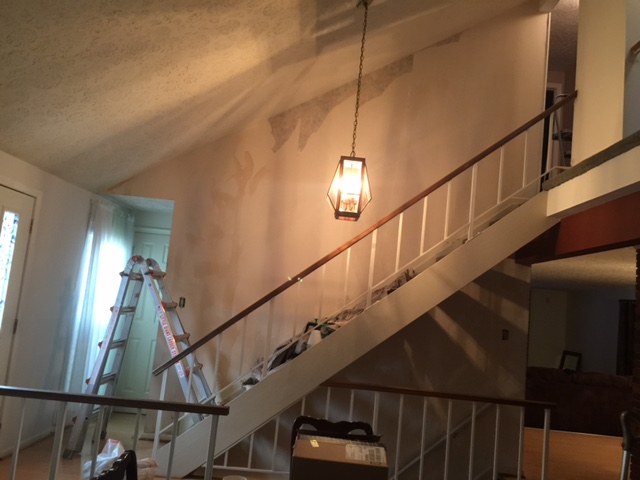
Then came the longest prepping process EVER.  Had to drag Joe's super heavy ladder up the stairs to reach those really nice, high walls.  Pretty scary to be that high up, on a gimpy foot- at this point I wasn't so in love with this "neat" feature.  There may have been an accident that involved me stepping off the ladder right onto a plug and breaking the outlet in half... may have been the reason I learned how to replace an outlet :P  Plus, with textured ceilings, it's tough to get the tape to seal along the top.


Once taped, I started with the smallest wall, and felt very accomplished.  As I stepped back and admired my work, I worried that it was the wrong color.  But, this is how I always feel when I start painting- that immediate sense of regret and uncertainty about selecting the color.  So, I continued on- I always tell myself that if I don't like it, I can always go back and paint it again later (even though I full well know that that's never gonna happen).


When I hit the third wall, I kept pulling up this pin (click on the photo to check out TheFrugalHousemaker.com blog):


She made it sound sooo easy.  I really wanted to try it, but as Tessa pointed out, her and I aren't always the best at measuring and visualizing.  At this point, I was running out of weekend time.  I decided to paint the wall the same color, and take the week to debate it.  This way, I could either paint over the whole wall in the accent color, or it was prepped for the diamonds.  So at 10pm on Sunday night, this is where I was... I removed all the tape and went to bed.  I spent all week debating about the wall.

Friday night I took this photo and photoshopped diamonds onto the wall to see what I thought.  It was a rough sketch, but gave me a bit of an idea of what to expect.  Saturday morning I got up super early, since I'm always up really early, and made my weekly 6am trip to Home Depot to pick up some yellow frog tape.  I had decided I was going to go for it- worst case scenario, if I didn't like it, I could paint over it with the one color.  I decided to use the yellow tape because it's made for more delicate surfaces- since I had just painted the lighter color days before, I didn't want it to peel off that paint.  My lines would be the lighter color, and the diamonds would be the dark gray.  Now, all I had to do was tape, and then paint over the tape- easy, right?!  I used The Frugal Homemaker's measurements- 24 inches high, 12 inches wide.  I used a level to make sure that I was marking straight, and started at the little peak.  These two lines of tape?  Took almost two hours to get up.  This was the point that I almost gave up.  I started to think if it was really worth it- if it took me two hours for two lines, how long would this project take?  I was getting really tired of climbing up and down the ladder.


But, I continued, one X and one line at a time.  And yes, I took a photo after almost every line, because each little line was a small victory.  The shorter side of the wall was a little easier.


About 5 hours later, the taping was done.  I knew that it would be simple from here on out.  I did battle with myself for a while though about whether the matte paint I had bought would work for this wall.  I decided to bite the bullet and go back and buy the same color in a glossy finish.  I figured if I did all this work, and it came down to me not liking it because it didn't have a sheen, than it was stupid that I didn't spend the $35 on the additional paint.  Once I brought it home, I worked quickly.  I didn't want to give the paint anytime to bleed under the tape.  So I quickly painted the entire wall once.  And then did a second coat.  Once I'd done both coats, I held my breath and immediately started to pull the tape off.  At first I started getting really upset, because right where I started pulling, I could see the paint had bled through.  All that work, and it was going to look like a big mess!  Frustrated, I pulled the rest of the tape off the wall, making sure to not get the tape/paint on the carpet.  However, after I got the rest down, I realized that was the only spot where it had bled.  It looked amazing already- and the paint wasn't even dry!


I started cleaning up the supplies, and moving back the furniture as it dried (and took a ton of pics to show off my handiwork).  As it dried, I could tell that glossy was the way to go- I don't think I would have been nearly as happy with the flat.


This was perfect for this room- that large wall NEEDED something.  I also bought some new bedroom furniture from Vintage Rust to go with this new room.  They are custom painting the dressers and nightstands white and distressing them to complete this room.  So excited to see how they look in here!  Also can't wait to get my hardwoods installed in this room.

This was a simple, but time-consuming project, and requires a lot of patience- but, the payoff outweighs it all!

Thursday, November 26, 2015

Wallpaper Wallpaper on the Wall- You are NOT the fairest one of all

In my house, they REALLY wanted to make sure that you knew it was an 80s house.  They wanted it to hit you like BAM when you walked right in.  I'm convinced that's why there was this lovely wallpaper on the huge, lofty wall in the entry.  And it had a sponge-painted look- so it was like a twofer- two really bad wall finishes all rolled into one.  I realized, I never took a photo of the entry before I started just ripping that sh-... stuff.... off the wall.  The listing photo is the best I've got.

But don't you worry... I have a close up down in the basement.  Oh, yea, that's right- they decided that it was such a beautiful selection, to carry it down the other stairwell.  They just couldn't get enough of it!

I know, everyone says that they HATE tearing down wallpaper.  When I watch my house hunting shows on TV, it always makes me cringe when someone says that they won't even consider a home because of the wallpaper.  Even now as I type, I can hear my besties Jonathan and Drew trying to convince a couple to look past the wallpaper in a home.  I decided to NOT try the technique the previous homeowner's technique of just painting over the wallpaper...


So I looked up the removal process- bought a sprayer, some ammonia, and some fabric softener.  Mixed them with some really warm water and put them in the sprayer- according to pinterest it would "melt off your walls just like butter".  It didn't.  I started peeling from the top down, and it was just coming off in tiny strips.  A few minutes in I was sitting on the step getting frustrated and decided to peel up the corner in front of me- it started to come off in one large section!  I tried it again- same thing!  So I got moving once again and got it all peeled off on the stairs next to the basement.  This was all I was planning to do because it was making my wood "feature" walls look so bad.  I ripped that stuff off in under an hour.  Oh- it also made the biggest mess I'd ever seen.  It was stuck all over my clothes, my shoes, the stairs... I also may have slipped on it and fallen down the stairs twice.


But here's the problem.  No one had told me that was only the front part of the wallpaper.  The melting butter stuff made me think my job was done.  It was not.  The whole backing of the wallpaper was still up.  At some point, it dawned on my very intelligent self that I wasn't down to the drywall.  So I went back to Home Depot (I'm convinced I keep them in business), and bought some TSP and a tool to scrape and some sponges.  When I read online to use that, at first I kept thinking I needed a teaspoon of something- took me a few moments to realize it was a chemical.  When I got home, I went back to work on the wall.  I soaked up the TSP and warm water with the sponge and started wiping and scraping the backing off.  Once I got all the pieces removed, I went back over it twice with the TSP, then once with just clean, warm water.  The wallpaper was off, but there were definitely some nicks and dings where I got a little overzealous with the scraper.  After I stood back and admired my handiwork, I realized I still had a whole day in my weekend- this meant I could tackle the upstairs.  Ya know, the one that I wasn't going to touch because of my lofty ceiling and super tall walls?  I'm 5'2"... ok, actually I'm 5' 1 3/4".  Those walls are super tall for me!  But again, I like to think I can do everything on my own.  So, I started spraying down the wallpaper and peeling.  This one was going way faster since I had learned from all my mistakes.  This time I used my ammonia/fabric softener mixture to take the back off too instead of the TSP.  There was just one problem.  There was this one spot that no matter how high I stood on my toes and leaned, I could not reach.  I sent this picture to my friend to show her the progress, and tell her that I wished in this moment I was 5'8" like her.  She noticed the ladder at the bottom of the stairs, and made a comment along the lines of "I hope you aren't going to put the ladder on the stairs because that's not a good idea."  Of course, I had already tried, but could only get it on the very first one.


At this point, I was so angry that I had come this far, I fought with this ladder for 45 minutes, but finally got it set up in the center of the stairs.  Each time I climbed up, I just hoped I wouldn't fall off or over my "safety hazard/not to code" railings.  Then, I wrapped up the job, wiping again with warm water.  Of course, after I got the wallpaper down, I HAD to paint it.  I couldn't just leave it.  But, I had to wait to do it since the wall was wet.  The internet gods recommended allowing at least 45 minutes to dry, so I just waited until the following weekend.  I totally left the ladder set up all week and had to climb around it everytime I went down the stairs.  I started taping.  As I'm sure you've noticed, I've got some fantastic textured ceilings- my knuckles were all cut up from taping the ceiling!


I wasn't sure what color I wanted this painted, since I haven't decided on anything on my main floor.  So again, I just dug through some paint that I already had and found some semi-gloss paint in the color "Baja".  It's a nice neutral color, and I wanted to use a semi gloss so it's easier to clean when people bang into the wall going up and down.  I did find in my research that I had to use a real primer after wallpaper, so the paint guy at home depot found me a gallon to get to work.


It already looked so crisp and clean.  Part of me REALLY wanted to just leave it this color.  Partially because I was exhausted, and partially because of the look.  But, I knew that I had to use real paint to protect it.  I covered both stairwells with two coats of the primer, then did two coats of the final color.  In the picture in the basement, it looks kind of pukey, but it's really not that color in person- note to self- replace lighting in the basement!  But it looks even better in the main entry, and I think that it really draws your eyes to that brick wall instead of the wallpapered wall.


Now, all I notice is the purple hallway upstairs.  Yes, purple paint!  I did not even realize it was purple until after the wallpaper came down.... now it's all I see!  A few coats of paint, and I'll have that fixed too!

Wednesday, November 25, 2015

Project #1- Basement wood paneling

I have been a little spoiled.  I bought brand new construction, and it spoiled me.  I had fresh, newly painted walls, gorgeous granite countertops. stainless steel appliances, real hardwood floors, brand new carpet.

But, I wanted a single family home.

With a yard.

In the nice neighborhood.

Out of the ghetto...

Enter new/old home!

Enter 13 different types of flooring.  Green and blue carpet.  Leveled floors.  Wood paneling.  Lots of holes.  Different colored outlets (because someone had the bright idea to paint them).  Textured ceilings.  More wallpaper.  Poor patch jobs.  More flooring.  Light switches that go to nothing.  Laminate countertops.  Painted doors.  Painted cabinets.  But I got the single family home.

I knew when I moved in that I had a long to-do list, but that I had to get started with the basement.  This beautiful space was what would make me some money to fund all of my other projects.  You totally want to rent this space, right?!

It was hideous.  So. Much. Brown!  I didn't even want to go down there, but I knew I had to.  I had to figure out if my latest pinterest project would fix the problem, or if I was going to have to tear it all out and drywall.  For some reason, they did the wood paneling in different directions- some was horizontal, some was diagonal.  I remember my friend saying "at least it's not the REALLY bad wood paneling."  Except, that was a lie- it was bad.


I had decided that I was going to white wash the wood, and that the paneling would provide great architectural detail (in other words, I was being cheap).  I dug around and found some paint from my previous home- White Shadow.  I remember as I was cleaning out my garage, my neighbor was telling his wife and I that he didn't know why we kept all our old paint and supplies- this was why!  This quart of paint would be enough to do all four sections of wood paneling.  I used a measuring cup and poured 1 cup of paint in a bucket, with 2 cups of water.  Of course, I had watched this youtube video on whitewashing, and this made me an expert:

https://www.youtube.com/watch?v=V4-p5lzzXig

I tried his technique.  I painted, then rubbed with a dry cloth.  Not only did this take forever, but I immediately regretted my decision just two boards in.  I kept it up through this whole piece of the wall.  Then sat on the stairs in front of it, and just stared at it.  It looked just awful.


I decided, to try one more coat before I quit and just painted the whole wall instead.  At this point, I stopped wiping it with the rag.  And suddenly, I started liking it better.  I started seeing my vision coming together- yes, I had a vision, I wasn't at all being impulsive ;)


When I hit the third stretch of wood, I had a little visitor.  You can see, she left all sorts of fun on the floor for me to trip over while painting.  But, she stood at my side as my little cheerleader telling me what a great job I was doing.  I can tell on the wall right where she arrived.  Dad says she tends to  leave her mark on most of his projects too.  By now, it was starting to look much more feminine...


but then I HAD to put some color on the walls, and tone down the navy blue in the little bedroom.  So again, I dug through some old paint, and found that I had a little gray left over.  I actually had two shades of gray.  Gray looks awesome with white, right?!  It looks even better when I don't have to spend more money on paint!


And I know you're thinking, I LOVE what the previous owner did with the paneling on the door.  Don't you worry... they did it on every other cabinet, closet, and bedroom door in the house.  Some they even did in a nice aqua color!

I've got the floors picked out and ready to go:


and that door and the baseboards will get done when those go in.  Until then, I just tell people not to look down at the hunter green carpet on the stairs.  Or the brown floor.  Or the one light switch that is half black and half white.  Basically, you're only allowed to look at my paint job!